> ## Documentation Index
> Fetch the complete documentation index at: https://autorender.io/docs/llms.txt
> Use this file to discover all available pages before exploring further.
# MCP Server (Experimental)
> Connect Autorender to AI models over the Model Context Protocol so they can upload, manage, and transform assets in your workspace.
The Autorender MCP server exposes your media tools to AI models such as Claude over the Model Context Protocol (MCP). A connected model can upload, manage, and transform assets in your Autorender workspace on its own.
The Autorender MCP server is in an experimental stage. Expect frequent updates and breaking changes as we refine the interface.
## Remote server (recommended)
Autorender hosts the MCP server. There's nothing to install and no local process to run — you point your client at one URL and authorize with your API key.
```text theme={null}
https://api-mcp.autorender.io/sse
```
This is a Streamable HTTP endpoint, the standard transport for remote MCP connections. Most clients handle authorization through a browser redirect on first use.
## Client setup
Each tab below carries the exact config for one client. Use the connection URL `https://api-mcp.autorender.io/sse` in every case.
Run in your terminal:
```bash theme={null}
claude mcp add --transport sse autorender https://api-mcp.autorender.io/sse
```
Restart Claude Code. Authorization happens on the first tool call.
1. In any chat, click the **+** button at the bottom of the input.
2. Select **Connectors**, then click **+** → **Add custom connector**.
3. Paste the connection URL:
```text theme={null}
https://api-mcp.autorender.io/sse
```
4. Click **Connect**. You are redirected to the Autorender authorization page.
5. Enter your API key from [Dashboard Settings](https://app.autorender.io/settings).
Add to `~/.cursor/mcp.json` (global) or `.cursor/mcp.json` in your project:
```json theme={null}
{
"mcpServers": {
"autorender": {
"url": "https://api-mcp.autorender.io/sse"
}
}
}
```
Cursor prompts for authorization on first use.
1. Open [v0.dev](https://v0.dev) and go to **Settings**.
2. Click **Add MCP** and enter the URL:
```text theme={null}
https://api-mcp.autorender.io/sse
```
3. Authorize with your Autorender API key when prompted.
## Headless environments (CI, servers)
Where no browser is available to complete the authorization redirect, send your API key as a Bearer token on the connection instead:
```text theme={null}
Authorization: Bearer YOUR_API_KEY
```
Create the key first — see [Create an API Key](/docs/create-an-api-key). Store it as `process.env.AUTORENDER_API_KEY` and never hardcode it in a committed config file.
## Authorization
On first connection you are redirected to the Autorender authorization page:
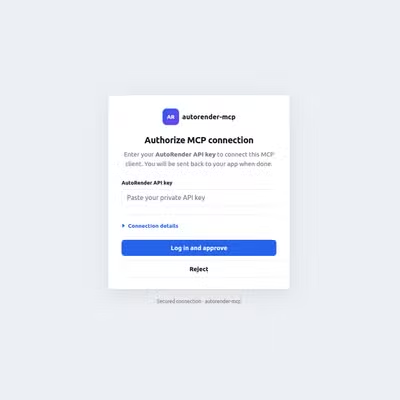
Enter your Autorender API key from [Dashboard Settings](https://app.autorender.io/settings). If you don't have a key yet, see [Create an API Key](/docs/create-an-api-key).
## Available tools
The MCP server exposes **13 tools** across three categories.
### Files
| Tool | Description |
| ------------- | ---------------------------------------------------------------- |
| `list_files` | List assets with optional folder, search, and pagination filters |
| `get_file` | Get details for a single asset by file number |
| `upload_file` | Upload an image, video, or document via direct upload |
| `update_file` | Add or remove tags and merge metadata on an asset |
| `rename_file` | Rename an asset's basename (extension unchanged) |
| `delete_file` | Permanently delete an asset |
### Multipart upload
For large files, in a three-step flow: start → upload parts → complete.
| Tool | Description |
| ----------------------- | ------------------------------------------------------------------- |
| `multipart_start` | Initialize a session and receive presigned part URLs (step 1 of 3) |
| `multipart_upload_part` | Upload one chunk to its presigned URL (step 2 of 3) |
| `multipart_complete` | Finalize the upload and return the stored file record (step 3 of 3) |
### Folders
| Tool | Description |
| --------------- | ------------------------------------------------ |
| `list_folders` | List folders for navigation or as upload targets |
| `create_folder` | Create a new folder |
| `rename_folder` | Rename an existing folder |
| `delete_folder` | Delete a folder |
## Why use the MCP server?
* **AI-driven transformations** — the model picks the crop, effect, or format from context.
* **No boilerplate** — skip the API integration layer for common media tasks.
* **Interactive testing** — chat with your media library to experiment with transformation strings.
## Next steps
Generate the key your MCP client authorizes with.
The same upload and file operations, called directly over HTTP.