> ## Documentation Index
> Fetch the complete documentation index at: https://autorender.io/docs/llms.txt
> Use this file to discover all available pages before exploring further.
# Brightness
> Lighten or darken an image across the whole frame with the e_brightness token.
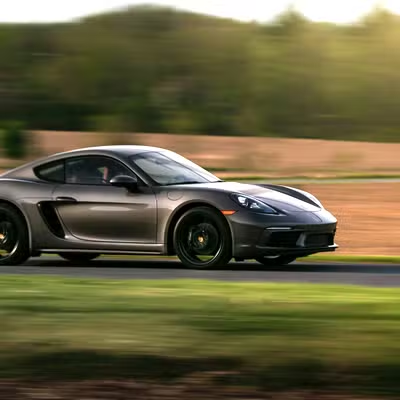
Brightness raises or lowers the light level across the entire image. Use it to rescue under- or overexposed shots, or to set a lighter or moodier tone.
Add the `e_brightness` token to the transform segment of any delivery URL:
```bash theme={null}
https://assets.autorender.io/LOKVTtKVGb/e_brightness:20/docs/example/porsche.jpg
```
## How does it work?
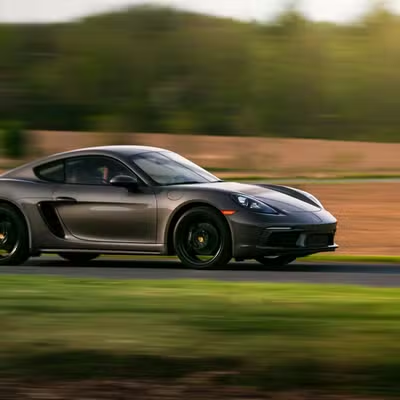
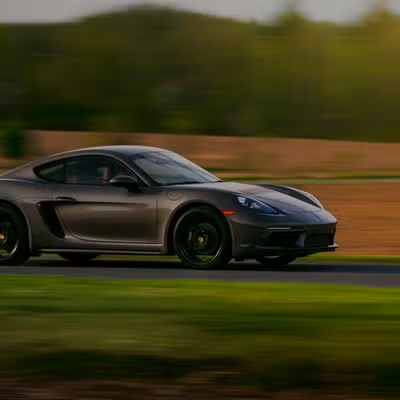
`e_brightness:{level}` shifts every pixel toward white or black. The level runs from **−100 to 100** — negative values darken, positive values brighten, and `0` leaves the image unchanged.
Compare levels:
```bash theme={null}
https://assets.autorender.io/LOKVTtKVGb/docs/example/porsche.jpg
```
 ```bash theme={null}
https://assets.autorender.io/LOKVTtKVGb/e_brightness:20/docs/example/porsche.jpg
```
```bash theme={null}
https://assets.autorender.io/LOKVTtKVGb/e_brightness:20/docs/example/porsche.jpg
```
 ```bash theme={null}
https://assets.autorender.io/LOKVTtKVGb/e_brightness:-30/docs/example/porsche.jpg
```
```bash theme={null}
https://assets.autorender.io/LOKVTtKVGb/e_brightness:-30/docs/example/porsche.jpg
```
 ## When to use it
* Correct exposure on images that render too dark or too bright.
* Brighten faces in backlit portraits.
* Keep product shots evenly lit and legible.
* Push toward a bright or moody atmosphere for creative work.
## How do you combine it with other effects?
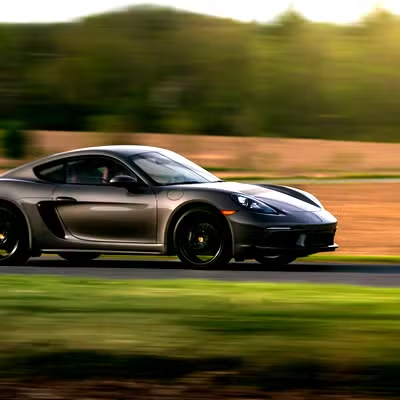
Chain brightness with other effects in one comma-separated segment. We recommend levels between **10 and 30** paired with a matching contrast bump, because a small brightness lift alone can look flat (e.g. `e_brightness:15,e_contrast:20`).
```bash theme={null}
https://assets.autorender.io/LOKVTtKVGb/e_brightness:15,e_contrast:20,e_saturation:10/docs/example/porsche.jpg
```
## When to use it
* Correct exposure on images that render too dark or too bright.
* Brighten faces in backlit portraits.
* Keep product shots evenly lit and legible.
* Push toward a bright or moody atmosphere for creative work.
## How do you combine it with other effects?
Chain brightness with other effects in one comma-separated segment. We recommend levels between **10 and 30** paired with a matching contrast bump, because a small brightness lift alone can look flat (e.g. `e_brightness:15,e_contrast:20`).
```bash theme={null}
https://assets.autorender.io/LOKVTtKVGb/e_brightness:15,e_contrast:20,e_saturation:10/docs/example/porsche.jpg
```
 ## Next steps
Widen or narrow the gap between light and dark areas with `e_contrast`.
Apply a camera-style exposure shift with `e_exposure`.
Adjust color intensity with `e_saturation`.
Browse every effect token and how they combine.
## Next steps
Widen or narrow the gap between light and dark areas with `e_contrast`.
Apply a camera-style exposure shift with `e_exposure`.
Adjust color intensity with `e_saturation`.
Browse every effect token and how they combine.