> ## Documentation Index
> Fetch the complete documentation index at: https://autorender.io/docs/llms.txt
> Use this file to discover all available pages before exploring further.

# Introduction

> Adjust color, tone, sharpness, and apply filters to any image with e_ effect tokens.

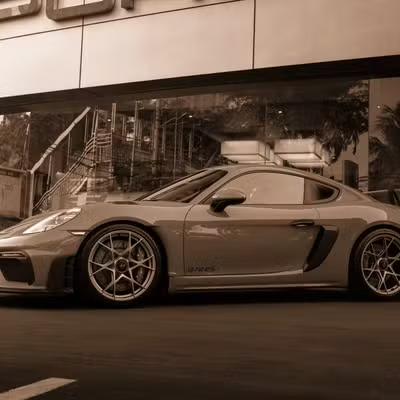
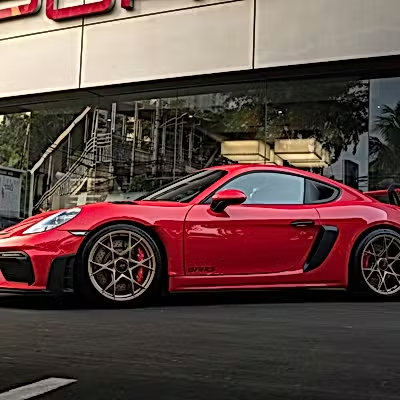
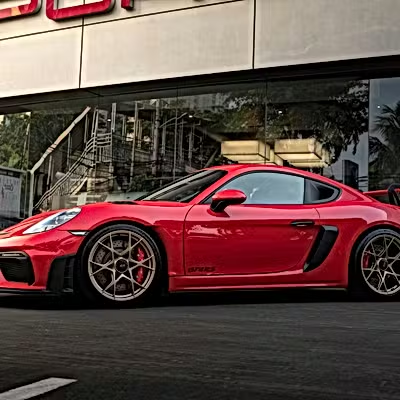
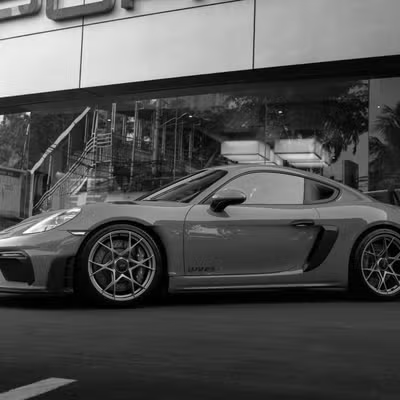
Effects adjust the color, tone, sharpness, and finish of an image at delivery time. Every effect is a token that starts with `e_` and goes in the transform segment of a delivery URL, and you can chain several in one comma-separated segment.

<Info>Effects apply to images. All effect tokens use the `e_` prefix, for example `e_brightness:20` or `e_grayscale`.</Info>

You can use effects to:

* Correct exposure, contrast, and color on uploaded photos.
* Match a house look across a catalog without re-editing source files.
* Apply artistic filters such as grayscale, fade, or vignette.
* Sharpen images after resizing so detail lands at delivery size.

## Tonal adjustments

Control the balance of light and dark.

| Effect                                            | Token          | Range           | What it does                        |
| ------------------------------------------------- | -------------- | --------------- | ----------------------------------- |
| [Brightness](/docs/transformations/effects/brightness) | `e_brightness` | `-100` to `100` | Lightens or darkens the whole frame |
| [Contrast](/docs/transformations/effects/contrast)     | `e_contrast`   | `-100` to `100` | Gap between light and dark areas    |
| [Exposure](/docs/transformations/effects/exposure)     | `e_exposure`   | `-100` to `100` | Camera-style exposure shift         |
| Highlights                                        | `e_highlights` | `-100` to `100` | Adjusts only the brightest areas    |
| Shadows                                           | `e_shadows`    | `-100` to `100` | Adjusts only the darkest areas      |
| Gamma                                             | `e_gamma`      | `-50` to `150`  | Adjusts mid-tone brightness         |

<Tabs>
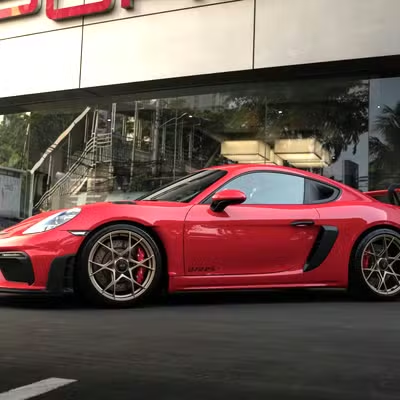
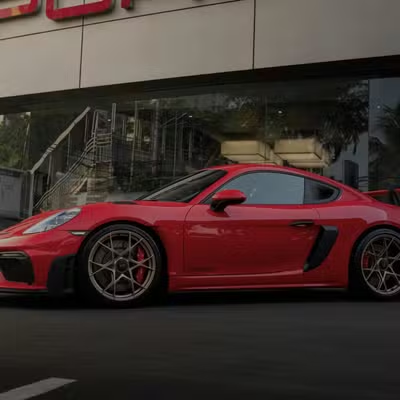
  <Tab title="Original">
    ```text theme={null}
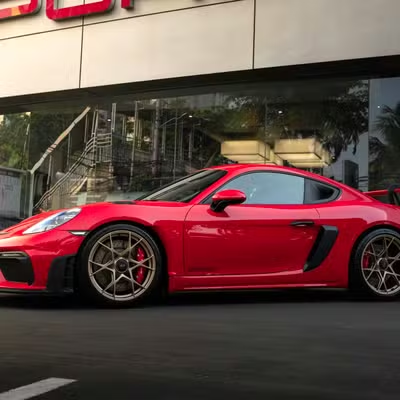
    https://assets.autorender.io/LOKVTtKVGb/doc1/porsche.jpg
    ```

    <div className="flex object-contain justify-center mt-4">
      <img src="https://assets.autorender.io/LOKVTtKVGb/doc1/porsche.jpg" alt="Original" className="border border-gray-200 dark:border-gray-800" />
    </div>
  </Tab>

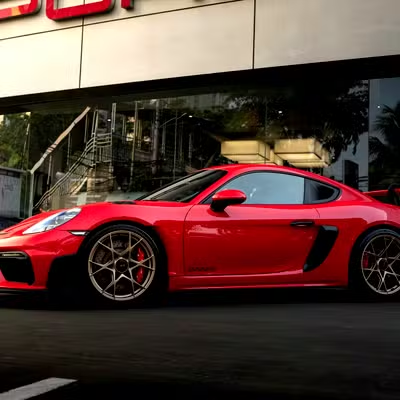
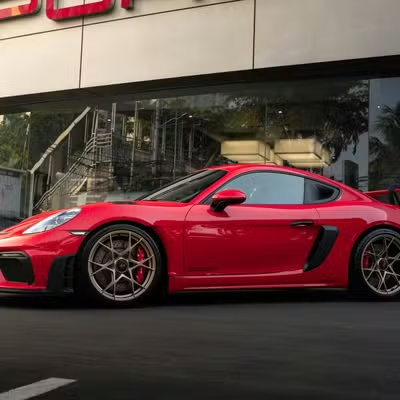
  <Tab title="Brightness (+20)">
    ```bash theme={null}
    https://assets.autorender.io/LOKVTtKVGb/e_brightness:20/doc1/porsche.jpg
    ```

    <div className="flex object-contain justify-center mt-4">
      <img src="https://assets.autorender.io/LOKVTtKVGb/e_brightness:20/doc1/porsche.jpg" alt="Brightness" className="border border-gray-200 dark:border-gray-800" />
    </div>
  </Tab>

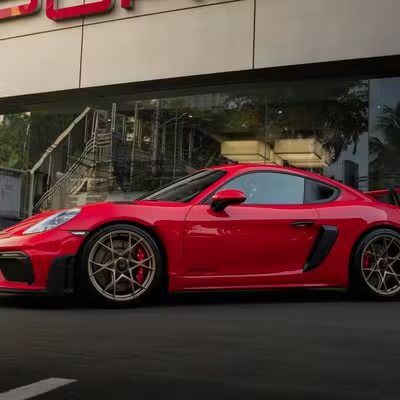
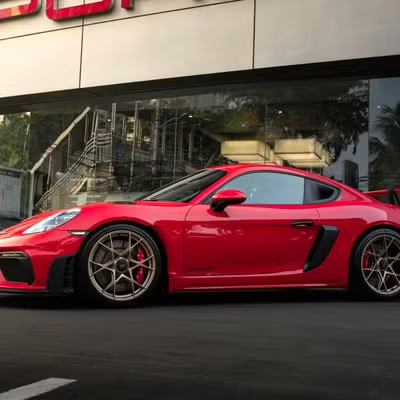
  <Tab title="Contrast (+30)">
    ```bash theme={null}
    https://assets.autorender.io/LOKVTtKVGb/e_contrast:30/doc1/porsche.jpg
    ```

    <div className="flex object-contain justify-center mt-4">
      <img src="https://assets.autorender.io/LOKVTtKVGb/e_contrast:30/doc1/porsche.jpg" alt="Contrast" className="border border-gray-200 dark:border-gray-800" />
    </div>
  </Tab>

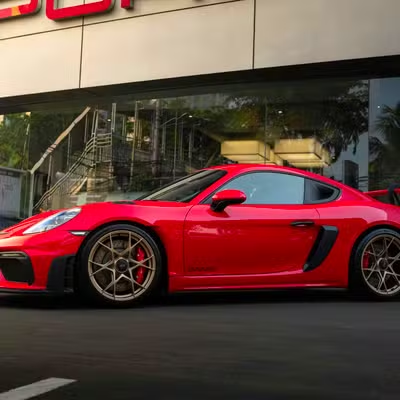
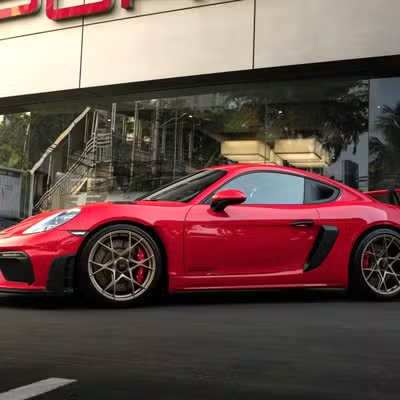
  <Tab title="Shadows (+40)">
    ```bash theme={null}
    https://assets.autorender.io/LOKVTtKVGb/e_shadows:40/doc1/porsche.jpg
    ```

    <div className="flex object-contain justify-center mt-4">
      <img src="https://assets.autorender.io/LOKVTtKVGb/e_shadows:40/doc1/porsche.jpg" alt="Shadows" className="border border-gray-200 dark:border-gray-800" />
    </div>
  </Tab>
</Tabs>

## Color enhancements

Adjust vibrancy, temperature, and tint.

| Effect                                            | Token           | Range           | What it does                      |
| ------------------------------------------------- | --------------- | --------------- | --------------------------------- |
| [Saturation](/docs/transformations/effects/saturation) | `e_saturation`  | `-100` to `100` | Intensity of colors               |
| Hue                                               | `e_hue`         | `-180` to `180` | Rotates colors on the color wheel |
| Temperature                                       | `e_temperature` | `-100` to `100` | Cool (blue) to warm (orange)      |
| Tint                                              | `e_tint`        | `-100` to `100` | Green-to-magenta balance          |

<Tabs>
  <Tab title="Original">
    <div className="flex object-contain justify-center mt-4">
      <img src="https://assets.autorender.io/LOKVTtKVGb/doc1/porsche.jpg" alt="Original" className="border border-gray-200 dark:border-gray-800" />
    </div>
  </Tab>

  <Tab title="Vibrant (+40)">
    ```bash theme={null}
    https://assets.autorender.io/LOKVTtKVGb/e_saturation:40/doc1/porsche.jpg
    ```

    <div className="flex object-contain justify-center mt-4">
      <img src="https://assets.autorender.io/LOKVTtKVGb/e_saturation:40/doc1/porsche.jpg" alt="Saturation" className="border border-gray-200 dark:border-gray-800" />
    </div>
  </Tab>

  <Tab title="Warmth (+30)">
    ```bash theme={null}
    https://assets.autorender.io/LOKVTtKVGb/e_temperature:30/doc1/porsche.jpg
    ```

    <div className="flex object-contain justify-center mt-4">
      <img src="https://assets.autorender.io/LOKVTtKVGb/e_temperature:30/doc1/porsche.jpg" alt="Temperature" className="border border-gray-200 dark:border-gray-800" />
    </div>
  </Tab>
</Tabs>

## Sharpening and clarity

Enhance texture and define edges.

| Effect                                      | Token            | Range         | What it does                      |
| ------------------------------------------- | ---------------- | ------------- | --------------------------------- |
| [Sharpen](/docs/transformations/effects/sharpen) | `e_sharpen`      | `1` to `2000` | Basic edge sharpening             |
| Unsharp mask                                | `e_unsharp_mask` | `1` to `2000` | Fine-grained detail enhancement   |
| Structure                                   | `e_structure`    | `0` to `100`  | Local contrast for texture detail |

<Tabs>
  <Tab title="Original">
    <div className="flex object-contain justify-center mt-4">
      <img src="https://assets.autorender.io/LOKVTtKVGb/doc1/porsche.jpg" alt="Original" className="border border-gray-200 dark:border-gray-800" />
    </div>
  </Tab>

  <Tab title="Sharpen (+150)">
    ```bash theme={null}
    https://assets.autorender.io/LOKVTtKVGb/e_sharpen:150/doc1/porsche.jpg
    ```

    <div className="flex object-contain justify-center mt-4">
      <img src="https://assets.autorender.io/LOKVTtKVGb/e_sharpen:150/doc1/porsche.jpg" alt="Sharpen" className="border border-gray-200 dark:border-gray-800" />
    </div>
  </Tab>

  <Tab title="Structure (+50)">
    ```bash theme={null}
    https://assets.autorender.io/LOKVTtKVGb/e_structure:50/doc1/porsche.jpg
    ```

    <div className="flex object-contain justify-center mt-4">
      <img src="https://assets.autorender.io/LOKVTtKVGb/e_structure:50/doc1/porsche.jpg" alt="Structure" className="border border-gray-200 dark:border-gray-800" />
    </div>
  </Tab>
</Tabs>

## Artistic filters

Apply a creative or stylized look.

| Filter                                          | Token          | Range           | What it does                                                          |
| ----------------------------------------------- | -------------- | --------------- | --------------------------------------------------------------------- |
| [Grayscale](/docs/transformations/effects/grayscale) | `e_grayscale`  | flag            | Removes all color for a black-and-white result                        |
| Black & white                                   | `e_blackwhite` | `0` to `100`    | Threshold to pure black or white pixels; the value sets the threshold |
| Fade                                            | `e_fade`       | `0` to `100`    | Vintage, washed-out appearance                                        |
| Vignette                                        | `e_vignette`   | `0` to `100`    | Darkens the edges of the image                                        |
| Blur                                            | `e_blur`       | `0.3` to `1000` | Gaussian blur                                                         |
| Invert                                          | `e_invert`     | flag            | Negative-image effect                                                 |

<Tabs>
  <Tab title="Grayscale">
    ```bash theme={null}
    https://assets.autorender.io/LOKVTtKVGb/e_grayscale/doc1/porsche.jpg
    ```

    <div className="flex object-contain justify-center mt-4">
      <img src="https://assets.autorender.io/LOKVTtKVGb/e_grayscale/doc1/porsche.jpg" alt="Grayscale" className="border border-gray-200 dark:border-gray-800" />
    </div>
  </Tab>

  <Tab title="Vintage (Fade)">
    ```bash theme={null}
    https://assets.autorender.io/LOKVTtKVGb/e_fade:60/doc1/porsche.jpg
    ```

    <div className="flex object-contain justify-center mt-4">
      <img src="https://assets.autorender.io/LOKVTtKVGb/e_fade:60/doc1/porsche.jpg" alt="Fade" className="border border-gray-200 dark:border-gray-800" />
    </div>
  </Tab>

  <Tab title="Vignette">
    ```bash theme={null}
    https://assets.autorender.io/LOKVTtKVGb/e_vignette:50/doc1/porsche.jpg
    ```

    <div className="flex object-contain justify-center mt-4">
      <img src="https://assets.autorender.io/LOKVTtKVGb/e_vignette:50/doc1/porsche.jpg" alt="Vignette" className="border border-gray-200 dark:border-gray-800" />
    </div>
  </Tab>
</Tabs>

## Auto enhancements

Let Autorender adjust the image for you.

* **Auto enhance (`e_auto_enhance`)** — normalization plus a mild brightness and saturation boost. Runs the same algorithm every time.
* **Normalize (`e_normalize`)** — stretches the dynamic range for stronger contrast.
* **Improve (`e_improve:indoor` / `e_improve:outdoor`)** — scene-specific modulation. A mode is required; `e_improve` with no mode does nothing.

<Tabs>
  <Tab title="Auto Enhance">
    ```bash theme={null}
    https://assets.autorender.io/LOKVTtKVGb/e_auto_enhance/doc1/porsche.jpg
    ```

    <div className="flex object-contain justify-center mt-4">
      <img src="https://assets.autorender.io/LOKVTtKVGb/e_auto_enhance/doc1/porsche.jpg" alt="Auto enhance" className="border border-gray-200 dark:border-gray-800" />
    </div>
  </Tab>

  <Tab title="Improve (outdoor)">
    ```bash theme={null}
    https://assets.autorender.io/LOKVTtKVGb/e_improve:outdoor/doc1/porsche.jpg
    ```

    <div className="flex object-contain justify-center mt-4">
      <img src="https://assets.autorender.io/LOKVTtKVGb/e_improve:outdoor/doc1/porsche.jpg" alt="Improve outdoor" className="border border-gray-200 dark:border-gray-800" />
    </div>
  </Tab>

  <Tab title="Improve (indoor)">
    ```bash theme={null}
    https://assets.autorender.io/LOKVTtKVGb/e_improve:indoor/doc1/porsche.jpg
    ```

    <div className="flex object-contain justify-center mt-4">
      <img src="https://assets.autorender.io/LOKVTtKVGb/e_improve:indoor/doc1/porsche.jpg" alt="Improve indoor" className="border border-gray-200 dark:border-gray-800" />
    </div>
  </Tab>
</Tabs>

## How does chaining work?

Combine effects in one comma-separated segment, for example `e_brightness:10,e_saturation:20,e_sharpen`.

Autorender applies them in a fixed pipeline — enhancements, then tonal, color, sharpen, and output — regardless of the order you write them, so the result is consistent. See [automatic ordering](/docs/optimization/automatic) for the full sequence. Chaining runs in a single pass, so it does not slow delivery.

<Tip>Start small. Levels of **10 to 20** read as natural correction; larger values look artificial because they push tones past what the source captured.</Tip>

## Next steps

<CardGroup cols={2}>
  <Card title="Brightness" icon="sun-bright" iconType="solid" href="/docs/transformations/effects/brightness">
    Lighten or darken the whole frame with `e_brightness`.
  </Card>

  <Card title="Contrast" icon="circle-half-stroke" iconType="solid" href="/docs/transformations/effects/contrast">
    Widen or narrow the gap between light and dark areas with `e_contrast`.
  </Card>

  <Card title="Saturation" icon="droplet" iconType="solid" href="/docs/transformations/effects/saturation">
    Increase or decrease color intensity with `e_saturation`.
  </Card>

  <Card title="Sharpen" icon="wand-sparkles" iconType="solid" href="/docs/transformations/effects/sharpen">
    Define edges and detail with `e_sharpen`.
  </Card>

  <Card title="Exposure" icon="sun" iconType="solid" href="/docs/transformations/effects/exposure">
    Apply a camera-style exposure shift with `e_exposure`.
  </Card>

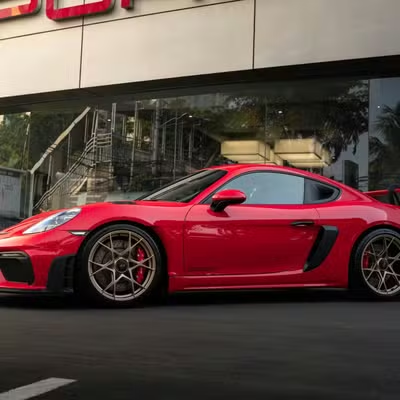
  <Card title="Grayscale" icon="circle-half-stroke" iconType="solid" href="/docs/transformations/effects/grayscale">
    Convert to black and white with `e_grayscale`.
  </Card>
</CardGroup>