> ## Documentation Index
> Fetch the complete documentation index at: https://autorender.io/docs/llms.txt
> Use this file to discover all available pages before exploring further.

# Rotate

> Rotate images by any angle, or auto-orient them from EXIF data, using the r_ parameter.

Rotate an image around its center with the `r_` parameter. Pass an angle in degrees, or use `r_auto`, `r_portrait`, or `r_landscape` to orient the image automatically.

<Info>
  Angles are normalized to the **0°–360°** range, so `r_450` is treated as `r_90`. Positive values rotate clockwise; negative values rotate counter-clockwise.
</Info>

## How does it work?

You add `r_{degrees}` to the transform segment. Autorender rotates the image around its center point and expands the canvas to fit the rotated result. Transparency is preserved for formats that support it, such as PNG and WebP.

<Tabs>
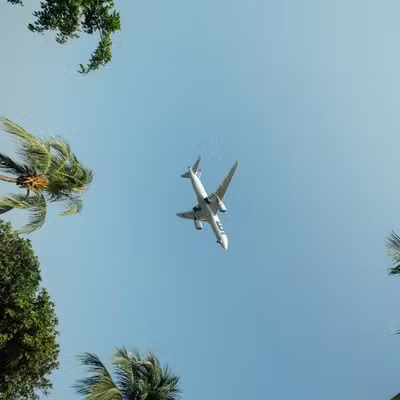
  <Tab title="Original (r_0)">
    ```text theme={null}
    https://assets.autorender.io/LOKVTtKVGb/w_360/doc1/flight.jpg
    ```

    <div className="flex object-contain justify-center mt-4">
      <img src="https://assets.autorender.io/LOKVTtKVGb/w_360/doc1/flight.jpg" alt="Original image" className="border border-gray-200 dark:border-gray-800" />
    </div>
  </Tab>

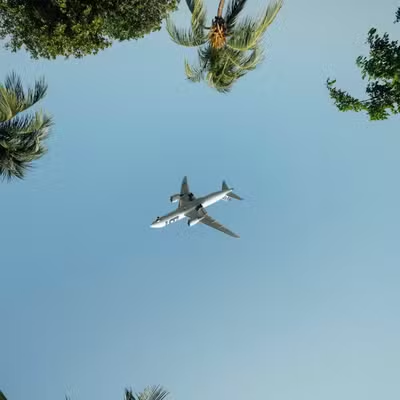
  <Tab title="Rotate 90°">
    ```text theme={null}
    https://assets.autorender.io/LOKVTtKVGb/w_360,r_90/doc1/flight.jpg
    ```

    <div className="flex object-contain justify-center mt-4">
      <img src="https://assets.autorender.io/LOKVTtKVGb/w_360,r_90/doc1/flight.jpg" alt="Rotated 90 degrees" className="border border-gray-200 dark:border-gray-800" />
    </div>
  </Tab>

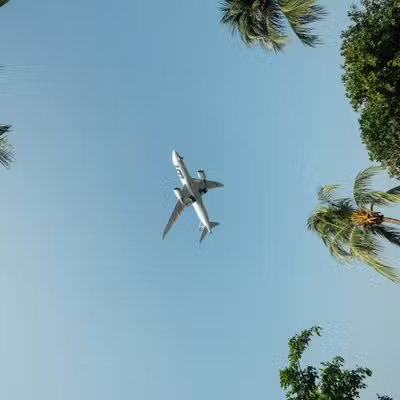
  <Tab title="Rotate 180°">
    ```text theme={null}
    https://assets.autorender.io/LOKVTtKVGb/w_360,r_180/doc1/flight.jpg
    ```

    <div className="flex object-contain justify-center mt-4">
      <img src="https://assets.autorender.io/LOKVTtKVGb/w_360,r_180/doc1/flight.jpg" alt="Rotated 180 degrees" className="border border-gray-200 dark:border-gray-800" />
    </div>
  </Tab>

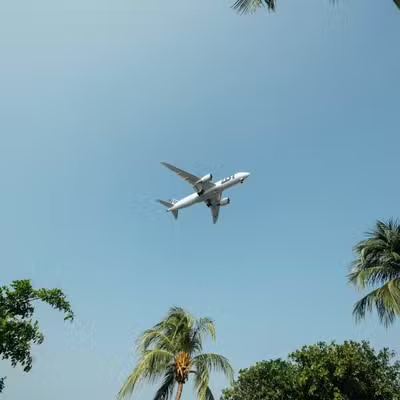
  <Tab title="Rotate 270°">
    ```text theme={null}
    https://assets.autorender.io/LOKVTtKVGb/w_360,r_270/doc1/flight.jpg
    ```

    <div className="flex object-contain justify-center mt-4">
      <img src="https://assets.autorender.io/LOKVTtKVGb/w_360,r_270/doc1/flight.jpg" alt="Rotated 270 degrees" className="border border-gray-200 dark:border-gray-800" />
    </div>
  </Tab>
</Tabs>

| Value       | Description                                     |
| ----------- | ----------------------------------------------- |
| `90`        | Quarter turn clockwise (portrait to landscape)  |
| `180`       | Half turn (upside down)                         |
| `270`       | Three-quarter turn clockwise                    |
| `auto`      | Corrects orientation from the image's EXIF data |
| `portrait`  | Rotates to a vertical orientation               |
| `landscape` | Rotates to a horizontal orientation             |

## How to auto-orient an image?

`r_portrait` and `r_landscape` force a target orientation regardless of how the photo was captured, which keeps galleries and product grids consistent. Autorender reads the image dimensions and applies the rotation needed (`90°`, `270°`, or `0°`) while preserving the original aspect ratio.

<Tabs>
  <Tab title="Original">
    ```text theme={null}
    https://assets.autorender.io/LOKVTtKVGb/w_360/doc1/coffee_cup.jpg
    ```

    <div className="flex object-contain justify-center mt-4">
      <img src="https://assets.autorender.io/LOKVTtKVGb/w_360/doc1/coffee_cup.jpg" alt="Original image" className="border border-gray-200 dark:border-gray-800" />
    </div>
  </Tab>

  <Tab title="Force portrait (r_portrait)">
    ```text theme={null}
    https://assets.autorender.io/LOKVTtKVGb/w_360,r_portrait/doc1/coffee_cup.jpg
    ```

    <div className="flex object-contain justify-center mt-4">
      <img src="https://assets.autorender.io/LOKVTtKVGb/w_360,r_portrait/doc1/coffee_cup.jpg" alt="Portrait rotation" className="border border-gray-200 dark:border-gray-800" />
    </div>
  </Tab>

  <Tab title="Force landscape (r_landscape)">
    ```text theme={null}
    https://assets.autorender.io/LOKVTtKVGb/w_360,r_landscape/doc1/coffee_cup.jpg
    ```

    <div className="flex object-contain justify-center mt-4">
      <img src="https://assets.autorender.io/LOKVTtKVGb/w_360,r_landscape/doc1/coffee_cup.jpg" alt="Landscape rotation" className="border border-gray-200 dark:border-gray-800" />
    </div>
  </Tab>
</Tabs>

## How to combine rotation with other transforms?

* Apply rotation before cropping so the crop acts on the rotated frame; for exact output dimensions, pair `r_` with `c_crop` or `c_fill`.
* Autorender preserves transparency when rotating PNG and WebP images, so rotated logos keep clean edges.

## Next steps

<CardGroup cols={2}>
  <Card title="Flip" icon="left-right" iconType="solid" href="/docs/transformations/flip">
    Mirror an image horizontally or vertically with `flip_`.
  </Card>

  <Card title="Crop" icon="crop-simple" iconType="solid" href="/docs/transformations/crop">
    Fix output dimensions after rotation with a crop mode.
  </Card>

  <Card title="Resize and aspect ratio" icon="ruler-combined" iconType="solid" href="/docs/transformations/resize-and-aspect-ratio">
    Set the width and height the rotated image renders at.
  </Card>

  <Card title="Recipes" icon="bookmark" iconType="solid" href="/docs/transformations/recipes">
    Save rotation combinations as reusable `t_` tokens.
  </Card>
</CardGroup>