AutoRender allows you to integrate your existing storage buckets directly into your workspace. By connecting an external source, you can transform and deliver assets stored in your own infrastructure without having to migrate or manually upload them to AutoRender.Documentation Index
Fetch the complete documentation index at: https://autorender.mintlify.app/llms.txt
Use this file to discover all available pages before exploring further.
Setup Flow
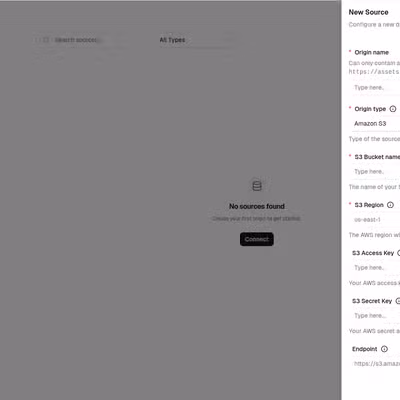
Connecting your external storage follows a simple three-step process in the AutoRender dashboard:- Login: Sign in to your AutoRender Dashboard.
- Navigate to Sources: Click on the Sources menu in the sidebar.
- Create Config: Click Connect or Create Source to configure your external storage provider.
Accessing Assets
Once your external storage is connected, you can access your assets using the following URL structure:- workspace: Your AutoRender workspace ID.
- origin: The Origin Name you assigned when creating the source.
- file_path: The relative path to the asset within your bucket or container.
Why use External Storage?
- Zero Migration: Keep your existing assets where they are.
- Security: AutoRender only reads from your storage when a transformation is requested.
- Scalability: Leverage your existing enterprise-grade storage providers.
Supported Providers
We currently support the following major storage providers:- Amazon S3
- Azure Blob Storage
- Google Cloud Storage
Security & Encryption
All credentials, access keys, and connection strings provided for external storage are stored in a fully encrypted format. For security purposes, these details are never displayed again after the source is created.
GetObject permissions for these integrations.