Documentation Index
Fetch the complete documentation index at: https://autorender.mintlify.app/llms.txt
Use this file to discover all available pages before exploring further.
Overview
AutoRender provides a comprehensive suite of effects to adjust colors, tones, sharpness, and apply artistic filters. All effects use the e_ prefix and can be combined for professional-grade image processing.
Tonal Adjustments
Control the light and dark balance of your images.
| Effect | Parameter | Range | Description |
|---|
| Brightness | e_brightness | -99 to 100 | Adjusts overall brightness |
| Contrast | e_contrast | -100 to 100 | Difference between light and dark areas |
| Exposure | e_exposure | -100 to 100 | Camera-style exposure adjustment |
| Highlights | e_highlights | -100 to 100 | Adjusts only the brightest areas |
| Shadows | e_shadows | -100 to 100 | Adjusts only the darkest areas |
| Gamma | e_gamma | -50 to 150 | Adjusts mid-tone brightness |
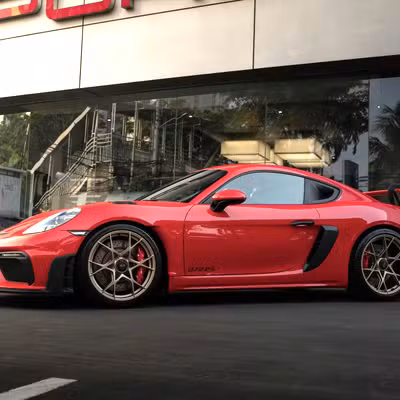
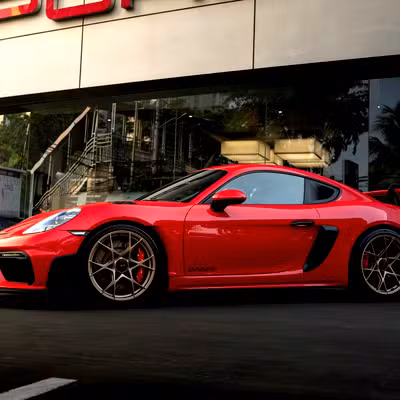
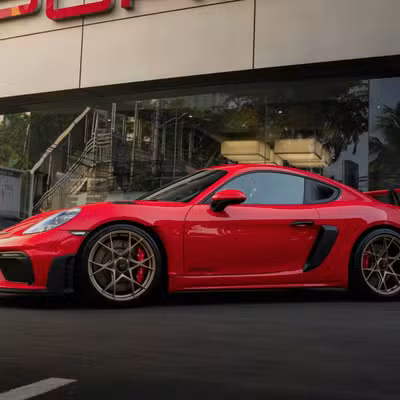
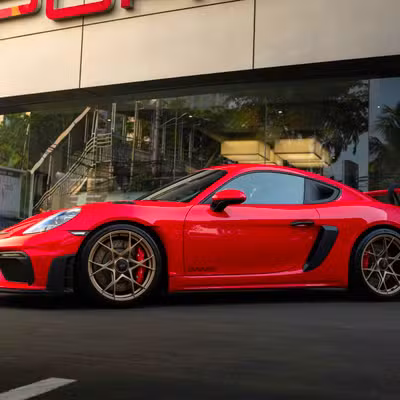
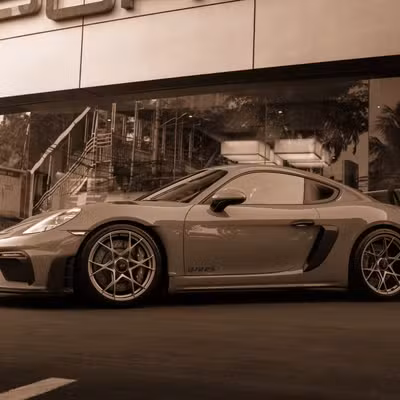
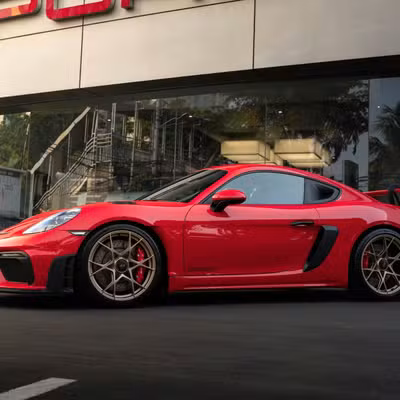
Original
Brightness (+20)
Contrast (+30)
Shadows (+40)
https://assets.autorender.io/LOKVTtKVGb/doc1/porsche.jpg
https://assets.autorender.io/LOKVTtKVGb/e_brightness:20/doc1/porsche.jpg
https://assets.autorender.io/LOKVTtKVGb/e_contrast:30/doc1/porsche.jpg
https://assets.autorender.io/LOKVTtKVGb/e_shadows:40/doc1/porsche.jpg
Color Enhancements
Adjust the vibrancy, temperature, and tint.
| Effect | Parameter | Range | Description |
|---|
| Saturation | e_saturation | -100 to 100 | Intensity of colors |
| Hue | e_hue | -180 to 180 | Rotates colors on the color wheel |
| Temperature | e_temperature | -100 to 100 | Cool (blue) to Warm (orange) |
| Tint | e_tint | -100 to 100 | Green to Magenta balance |
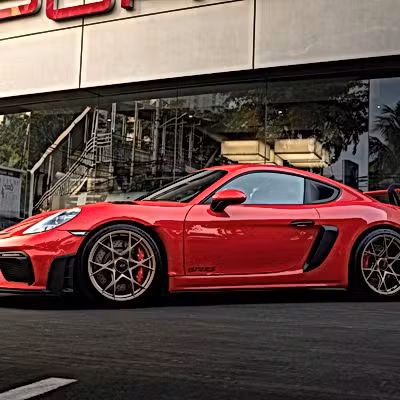
Original
Vibrant (+40)
Warmth (+30)
https://assets.autorender.io/LOKVTtKVGb/e_saturation:40/doc1/porsche.jpg
https://assets.autorender.io/LOKVTtKVGb/e_temperature:30/doc1/porsche.jpg
Sharpening & Clarity
Enhance textures and define edges.
| Effect | Parameter | Range | Description |
|---|
| Sharpen | e_sharpen | 1 to 2000 | Basic edge sharpening |
| Unsharp Mask | e_unsharp_mask | 1 to 2000 | Professional detail enhancement |
| Structure | e_structure | 0 to 100 | Local contrast for texture detail |
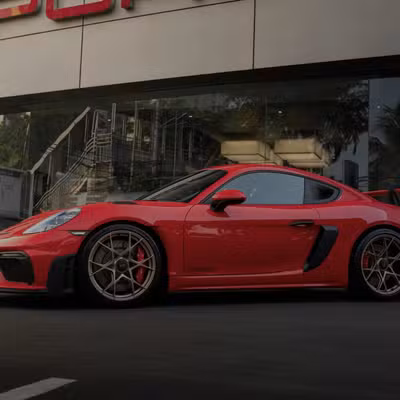
Original
Sharpen (+150)
Structure (+50)
https://assets.autorender.io/LOKVTtKVGb/e_sharpen:150/doc1/porsche.jpg
https://assets.autorender.io/LOKVTtKVGb/e_structure:50/doc1/porsche.jpg
Artistic Filters
Apply creative and aesthetic looks.
| Filter | Parameter | Range | Description |
|---|
| Grayscale | e_grayscale | - | Classic black and white conversion |
| Fade | e_fade | 0 to 100 | Vintage washed-out appearance |
| Vignette | e_vignette | 0 to 100 | Darkens the edges of the image |
| Blur | e_blur | 0.3 to 1k | Gaussian blur effect |
| Invert | e_invert | - | Negative image effect |
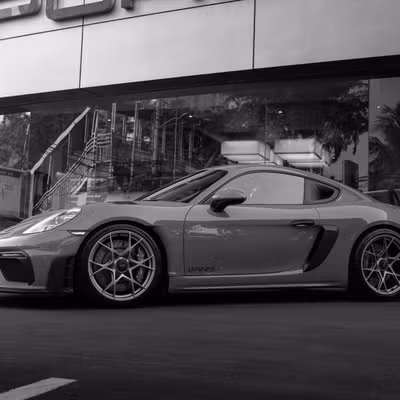
Grayscale
Vintage (Fade)
Vignette
https://assets.autorender.io/LOKVTtKVGb/e_grayscale/doc1/porsche.jpg
https://assets.autorender.io/LOKVTtKVGb/e_fade:60/doc1/porsche.jpg
https://assets.autorender.io/LOKVTtKVGb/e_vignette:50/doc1/porsche.jpg
Auto Enhancements
Let AutoRender intelligently optimize your images.
- Auto Enhance (
e_auto_enhance): Broad optimization for clarity and color.
- Normalize (
e_normalize): Stretches dynamic range for better contrast.
- Improve (
e_improve): Scene-specific optimization (modes: indoor, outdoor).
https://assets.autorender.io/LOKVTtKVGb/e_auto_enhance/doc1/porsche.jpg
Best Practices
- Order Matters: Effects are applied in an optimized pipeline (Enhancements → Tonal → Color → Sharpen → Output).
- Subtle Adjustments: Large values often look artificial. Start with 10-20% and adjust.
- Combined Effects: You can chain multiple effects:
e_brightness:10,e_saturation:20,e_sharpen.
- Performance: Chaining effects does not significantly impact delivery speed as they are processed in a single pass.