

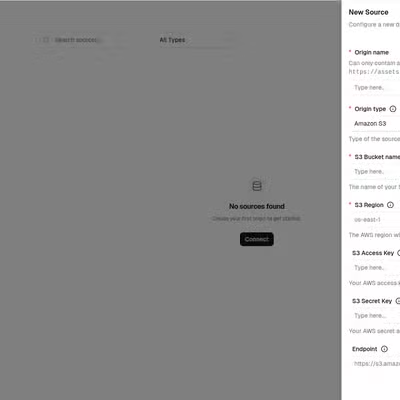
Add your source to Autorender
In the dashboard, open Sources, click Connect, and choose Amazon S3. See Connect a source for the full walkthrough. Then fill in the fields below.Field mapping
Each field on the Autorender form maps to a value from your AWS Console:
The Origin Name is your own label for the source and becomes part of every delivery URL:
https://assets.autorender.io/{workspace}-{origin}/{file_path}. For a public bucket you can leave the access key and secret key blank.
Paste the bucket name (
acme-assets), not its ARN (arn:aws:s3:::acme-assets) and not the S3 URL. The name is what appears in the bucket list in the S3 console.Where to find each value
1
Copy the bucket name and region from the S3 console.
Open the S3 Management Console and find your bucket in the list. The name is the column you click; the region is shown next to it (e.g.
us-east-1).Paste the bucket name (
acme-assets), not its ARN. The Region must match the bucket’s actual region, or reads fail.2
Create a read-only IAM user in the IAM console.
We recommend a dedicated IAM user with a custom policy granting only
s3:GetObject on this one bucket, so a leaked key can reach nothing else. The AmazonS3ReadOnlyAccess managed policy also works but grants read access to every bucket in the account.3
Generate an access key for that user and paste both parts.
Under the user’s Security credentials, create an access key. Paste the access key ID into S3 Access Key and the secret access key into S3 Secret Key.
4
(Optional) Set a custom endpoint for S3-compatible services.
Leave Endpoint at the default
https://s3.amazonaws.com for Amazon S3. For MinIO or DigitalOcean Spaces, enter that service’s endpoint instead.Next steps
Access your assets
Build a delivery URL for objects in your bucket.
Image transformations
Resize, crop, and convert the assets you deliver.