

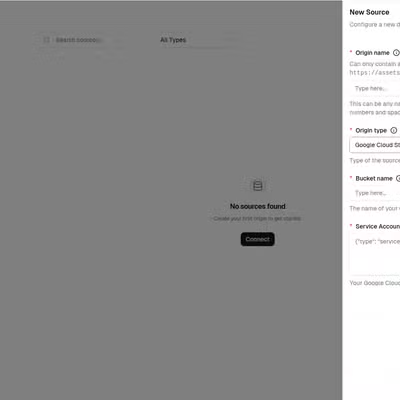
Add your source to Autorender
In the dashboard, open Sources, click Connect, and choose Google Cloud Storage. See Connect a source for the full walkthrough. Then fill in the fields below.Field mapping
Each field on the Autorender form maps to a value from your Google Cloud Console:
The Origin Name is your own label for the source and becomes part of every delivery URL:
https://assets.autorender.io/{workspace}-{origin}/{file_path}.
Paste the full contents of the JSON key file into Service Account JSON, not the file path and not the download URL. Paste everything from the opening brace to the closing brace, including the private key.
Where to find each value
1
Copy the bucket name from the Cloud Storage browser.
Open Cloud Storage in the Google Cloud Console and copy the bucket’s name from the list (e.g.
acme-assets).2
Create a read-only service account.
Go to IAM & Admin → Service Accounts and create an account (e.g.
autorender-read-only). Grant it the Storage Object Viewer role on this bucket only, so a leaked key can reach nothing else.3
Create a JSON key for that service account.
On the account’s Keys tab, click Add Key → Create new key → JSON. The file downloads once.
4
Paste the entire file into Service Account JSON.
Open the downloaded file and paste its full contents into the field.
Paste the JSON contents, not the file path — the entire object from the downloaded key file.
Next steps
Access your assets
Build a delivery URL for objects in your bucket.
Image transformations
Resize, crop, and convert the assets you deliver.